Use this stretchy crochet ribbing tutorial to make your next project fit – so you’ll actually wear it!
Avoid the classic crochet tragedy –
We’ve all been there.
You slaved away over your last project, dreaming about how cute your shirt or crop top would look.
But when you finish and finally get to try it on –
It doesn’t fit like you hoped.
Maybe it’s too loose in some spots, slightly too tight in others. Although the stitch work is impeccable, it’s too rigid to wear comfortably.
So it sits in the bottom of your drawer, where you’ll occasionally look at it, and feel guilty about it.
No longer!
Get out those old WIPs, revamp your dusty crop tops, it’s time to make your crochet work for your body and your lifestyle.
This crochet ribbing is so unbelievably stretchy, soft, breathable, and squishy, it’ll create the comfiest crochet wearables you’ll never want to take off.
I’m currently designing a tank top pattern that uses this rib stitch – so be sure to stay tuned for the free pattern release!
Is it beginner friendly?
Crochet ability levels are made up, so if you’re a beginner I won’t tell you no –
But I will say you might get frustrated if you don’t have a couple projects under your belt first.
I will post a more beginner friendly ribbing tutorial soon, and link it here – but this slip-stitch ribbing is best for maximum stretch and mimicking the knit ribbing look.
This stitch can be a little tricky to get at first, so I would advise practicing on DK or thicker yarn before incorporating it.
I have a help section at the end of this tutorial for how to solve common struggles with this stitch.
Now, let’s get into it!
Ribbed Crochet Slip-Stitch
Use whatever hook size is recommended for the yarn, or size up for extra stretch.
If you’re struggling, remember –
The key is VERY low tension, so loosen your grip.
To create this stitch, you will alternate between two types of rows – but first, let’s create the foundation.
Foundation Row
Start by creating a slip knot and chaining the length you would like, plus one chain.
Turn your work, slip stitch into second chain from hook, and continue down the row.
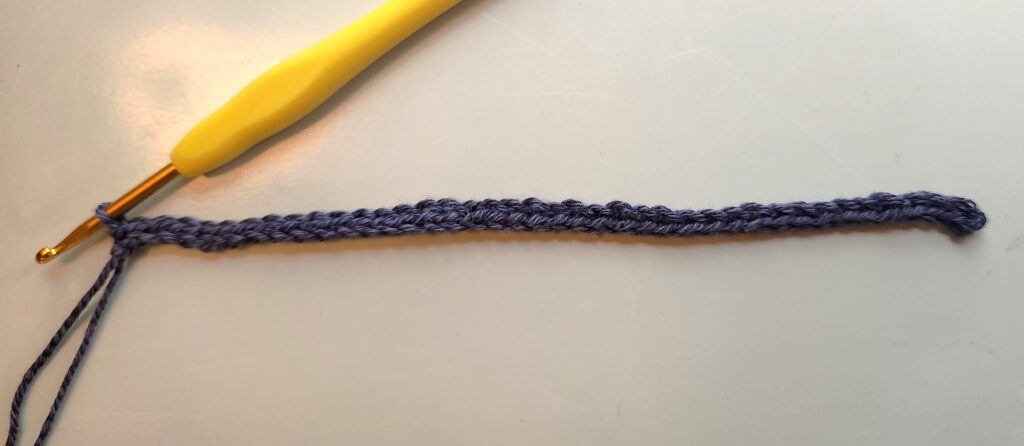
Now ch1, and turn your work.
Double Slip Stitch Row (Back Loop)
Here’s where you’ll start working in the back loop of each stitch.
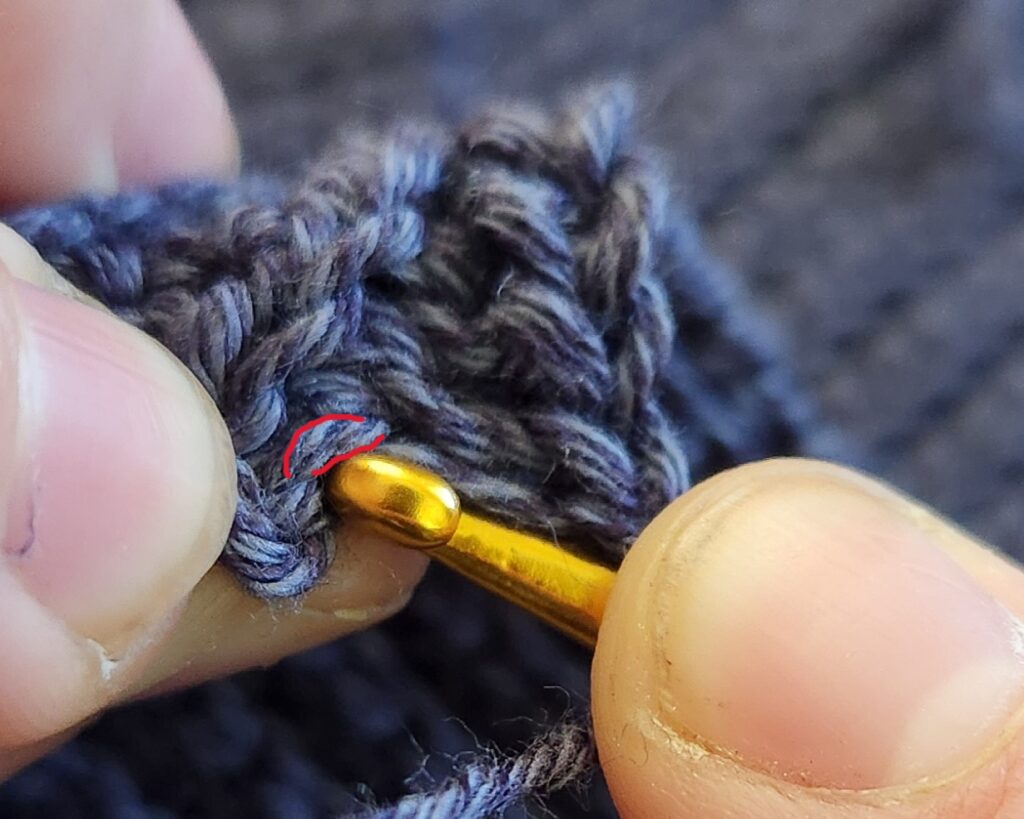
This row will be your first double slip stitch.
The below photo shows the loop you should work in, marked in red.
I’ll show you the details of this stitch on a WIP that’s further along, so my fingers don’t get in the way.
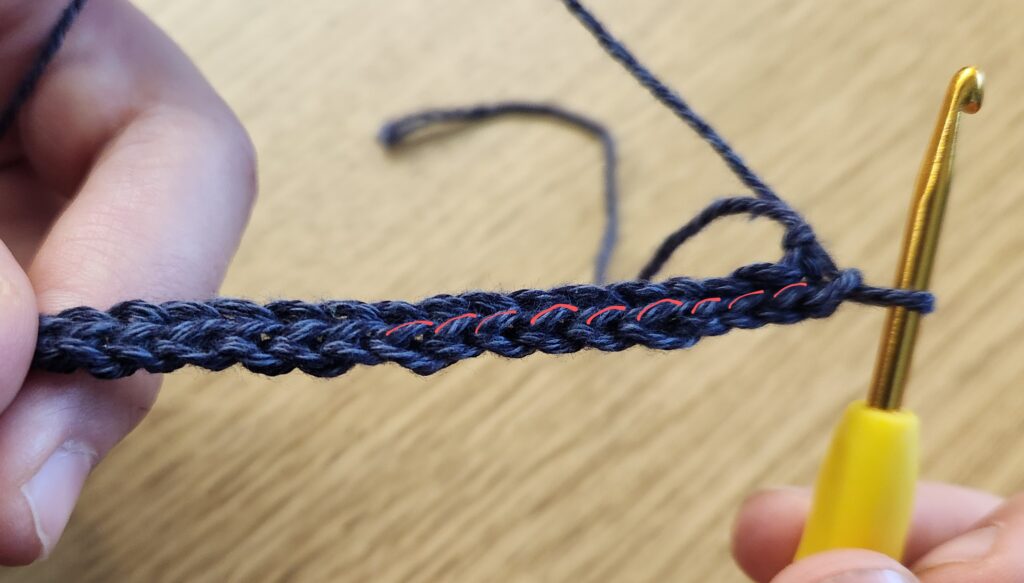
So go ahead and yarn over, then insert hook into first back loop.
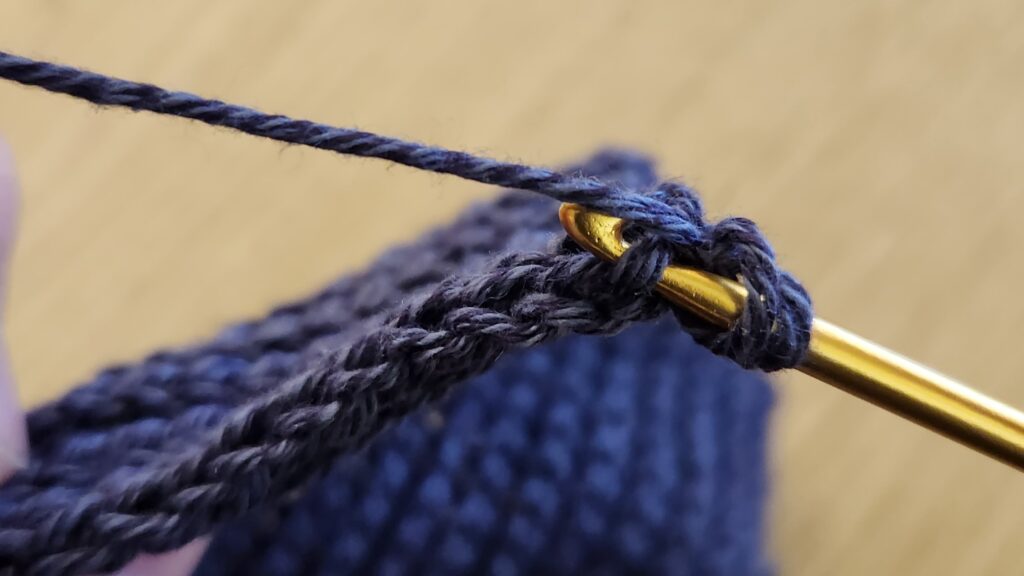
Now yarn over.
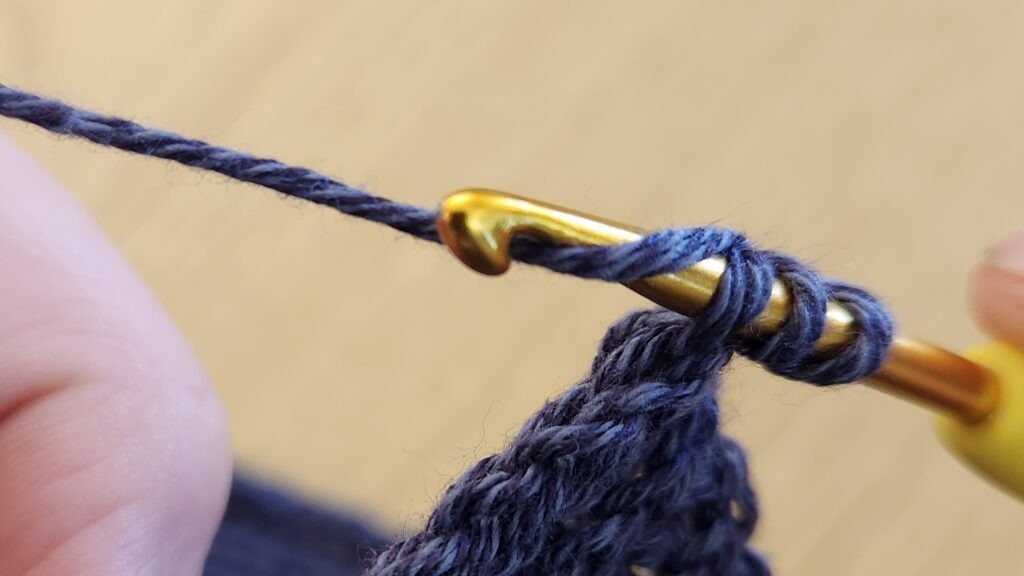
And pull up a loop, through all three loops on hook.
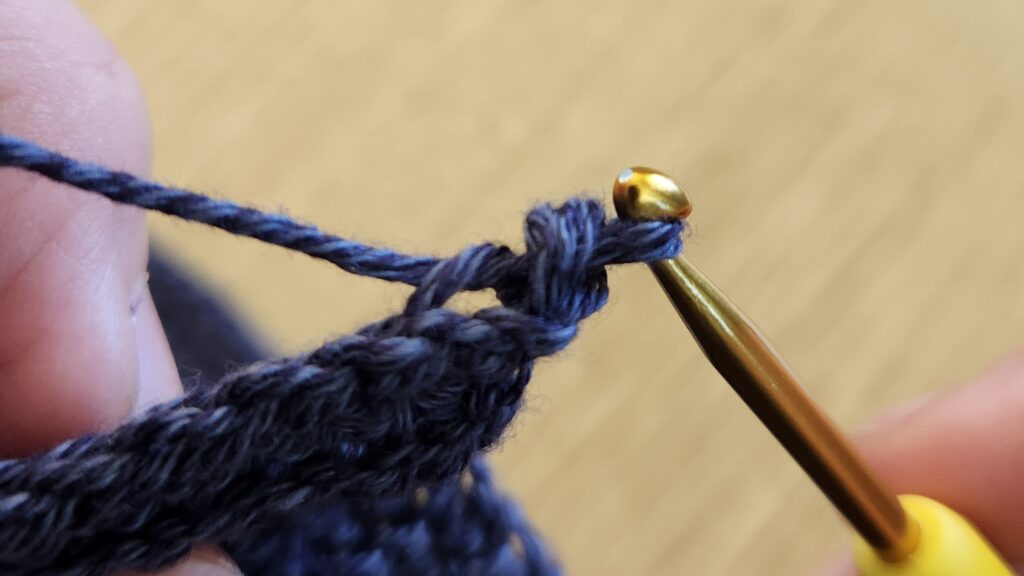
This is the tricky part, so be patient and LOOSEN your tension.
*Does this row have you stumped? Scroll down to the help section!
Continue to work this back loop double slip stitch down the row.
As you approach the end of this row, take a look at what will be the last back loop of this row.
The last back loop is marked in red here. As you can see, it’s easy to lose under the chain one.
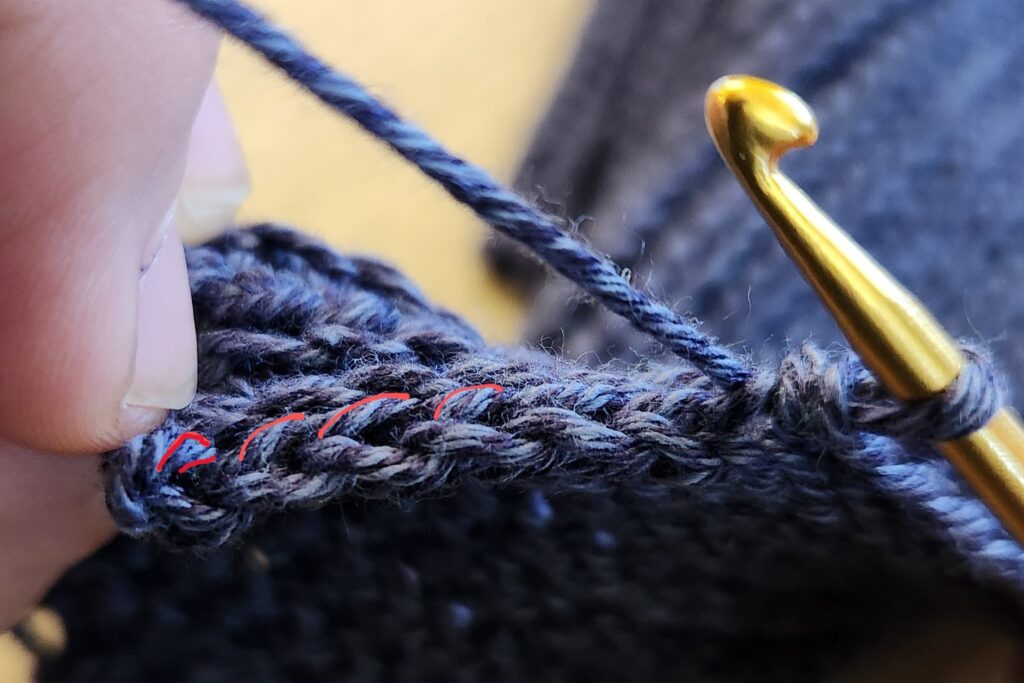
This is what it should look like at the end of the row.
Slip Stitch Row (Back Loop)
Once you have finished the back loop double slip stitch row, chain one and turn your work.
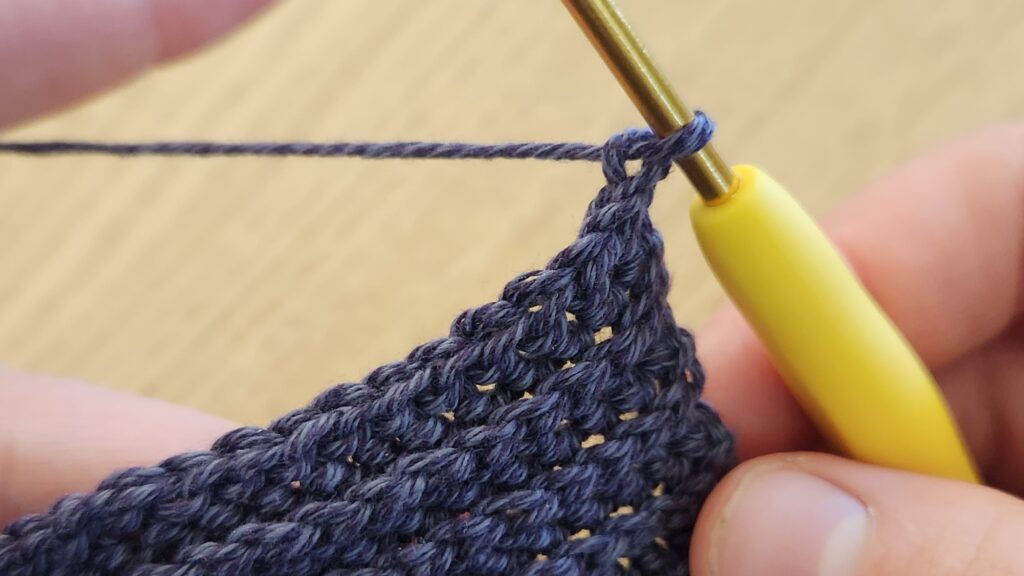
Now you’ll slip stitch into the back loop of the first stitch, and continue down the row.
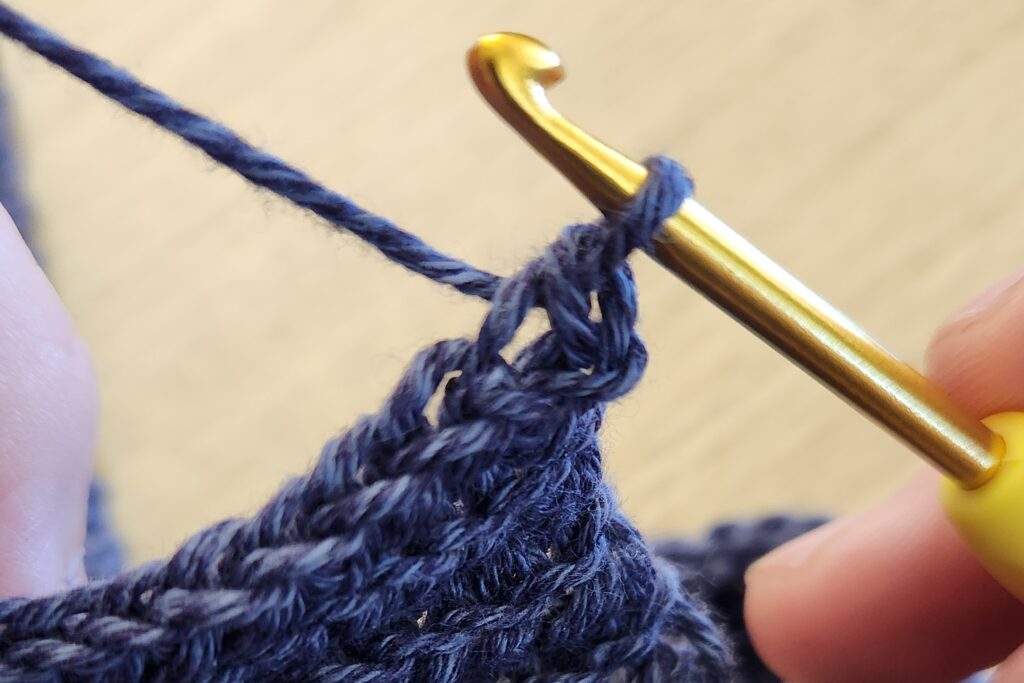
Again, take a look at the last back loop as you approach the end of the row.
It’s marked in red, tucked under the chain one, so make sure not to miss it.
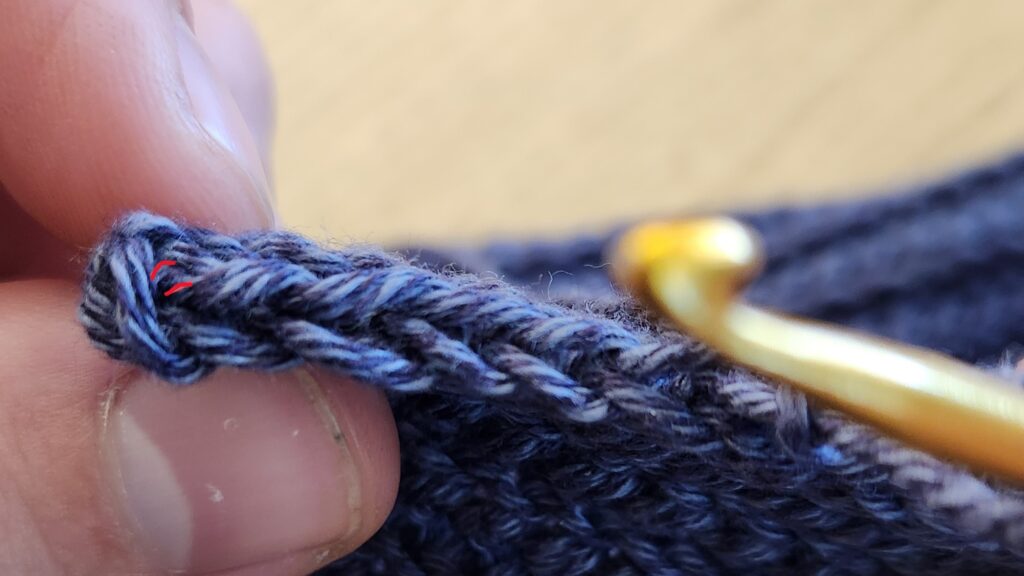
Once you finish this row, you’ll chain one, complete a back loop double slip stitch row, and continue alternating rows. Happy ribbing!
Help with Common Issues
Trouble with the double slip stitch
This is pretty normal to struggle with – it’s tricky to get at first!
So here are some tricks I use:
Remember to keep your tension consistently loose throughout each row.
Once you’ve yarned over and inserted your hook, pull a loop up – only through the first loop on your hook.
Use your hook to pull up, loosening all the remaining loops on your hook.
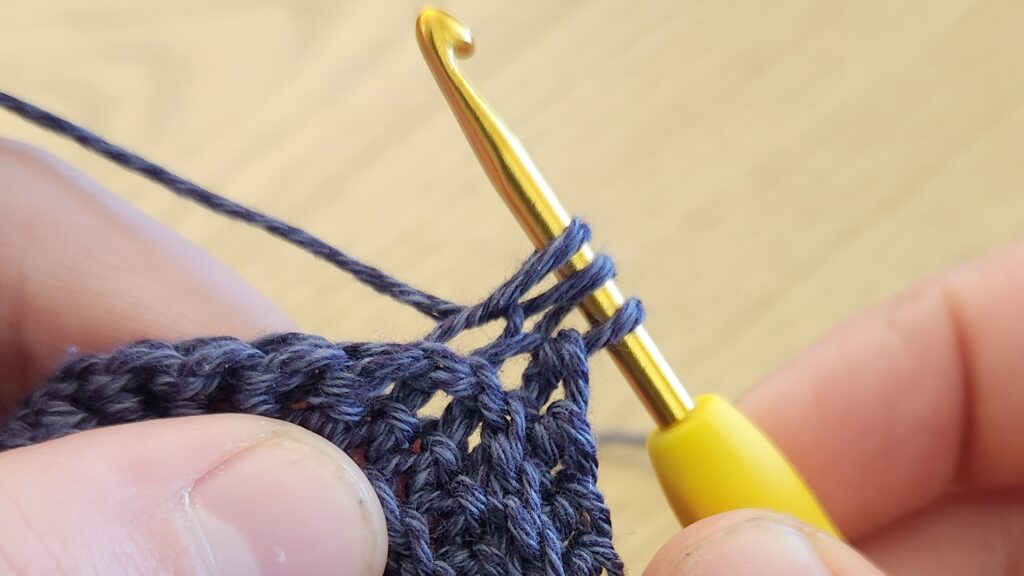
Now gently tighten the first loop by tugging on the working yarn in your hand.
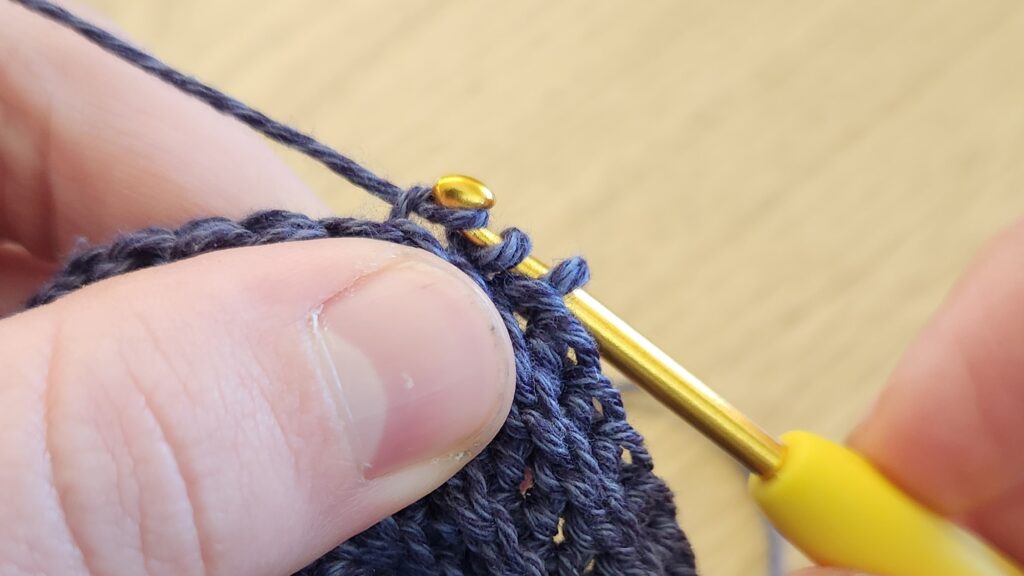
Continue to keep a bit of tension on this working yarn while you guide the hook through the first hook, in the pictured orientation.
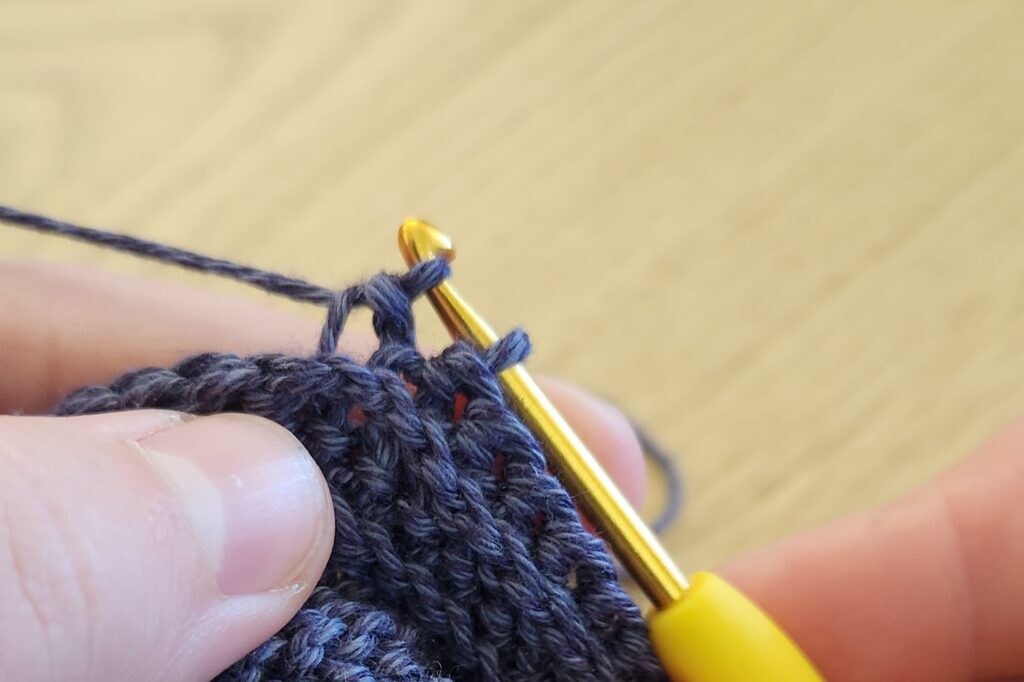
Now turn your hook and pull through the last loop.
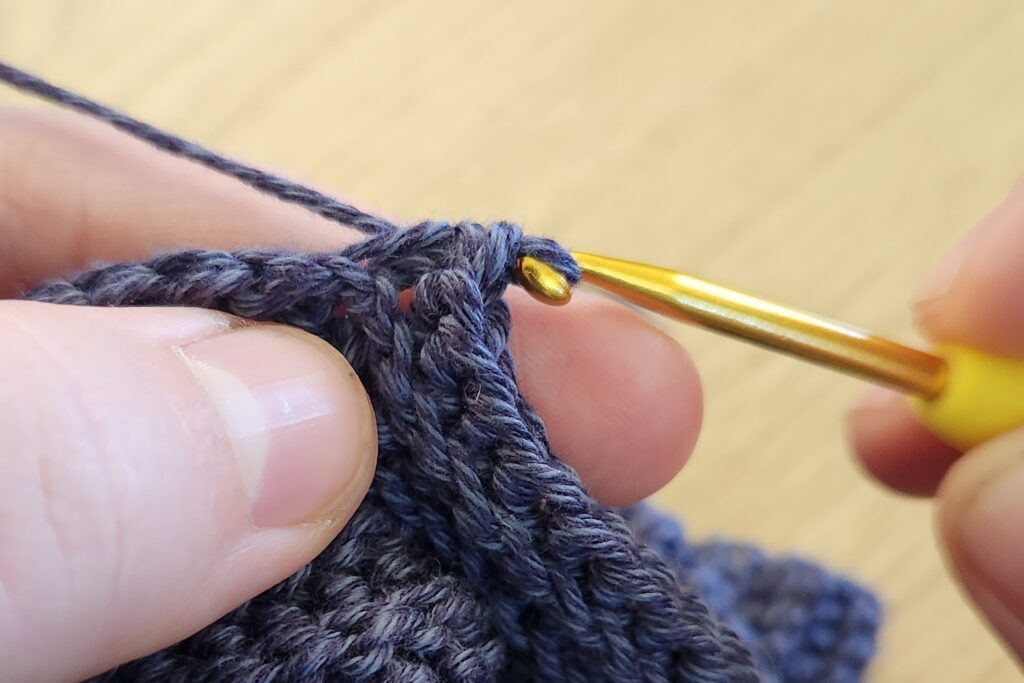
And there you have it! You’ll get faster at this stitch as you practice.
The edges of my ribbing aren’t straight
This is a problem I had too.
If you’re several rows in and it’s super uneven, this usually means you are missing the last back loop of each row and might be working into the chain one.
Check out the pictures in the tutorial for each row, and make sure you’re finding the right back loop.
But remember that the edges usually won’t be perfectly straight until after blocking.
You can also stitch over the edges with single crochet, if it bothers you too much.
I’m dropping/increasing stitches on accident
This is usually a symptom of the same problem as above, which is why I recommend starting with a thicker yarn, as it’s easier to see the back loop.
Take a close look at the end of row photos in each row tutorial.
Is there an easy way to count rows with this ribbing?
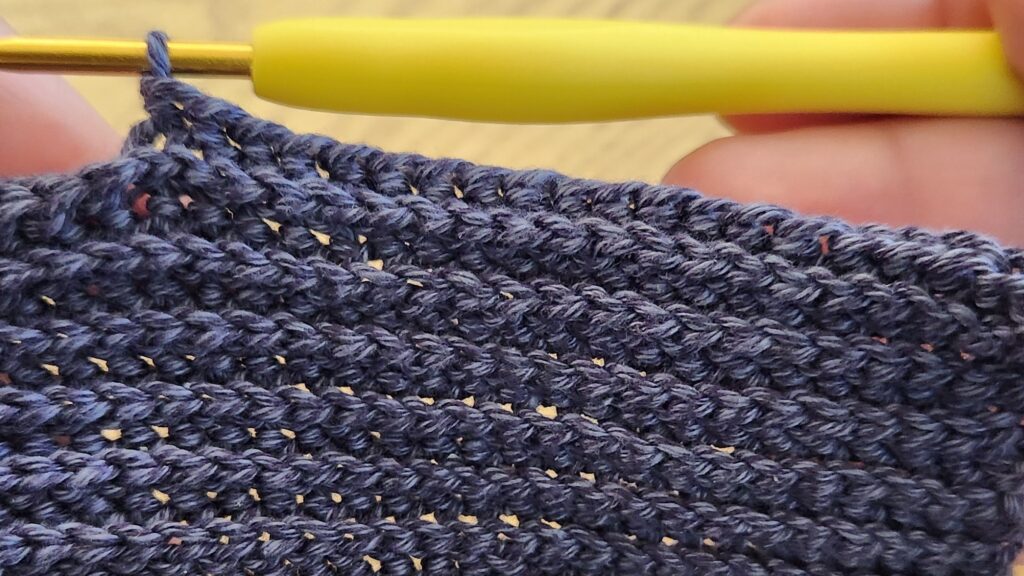
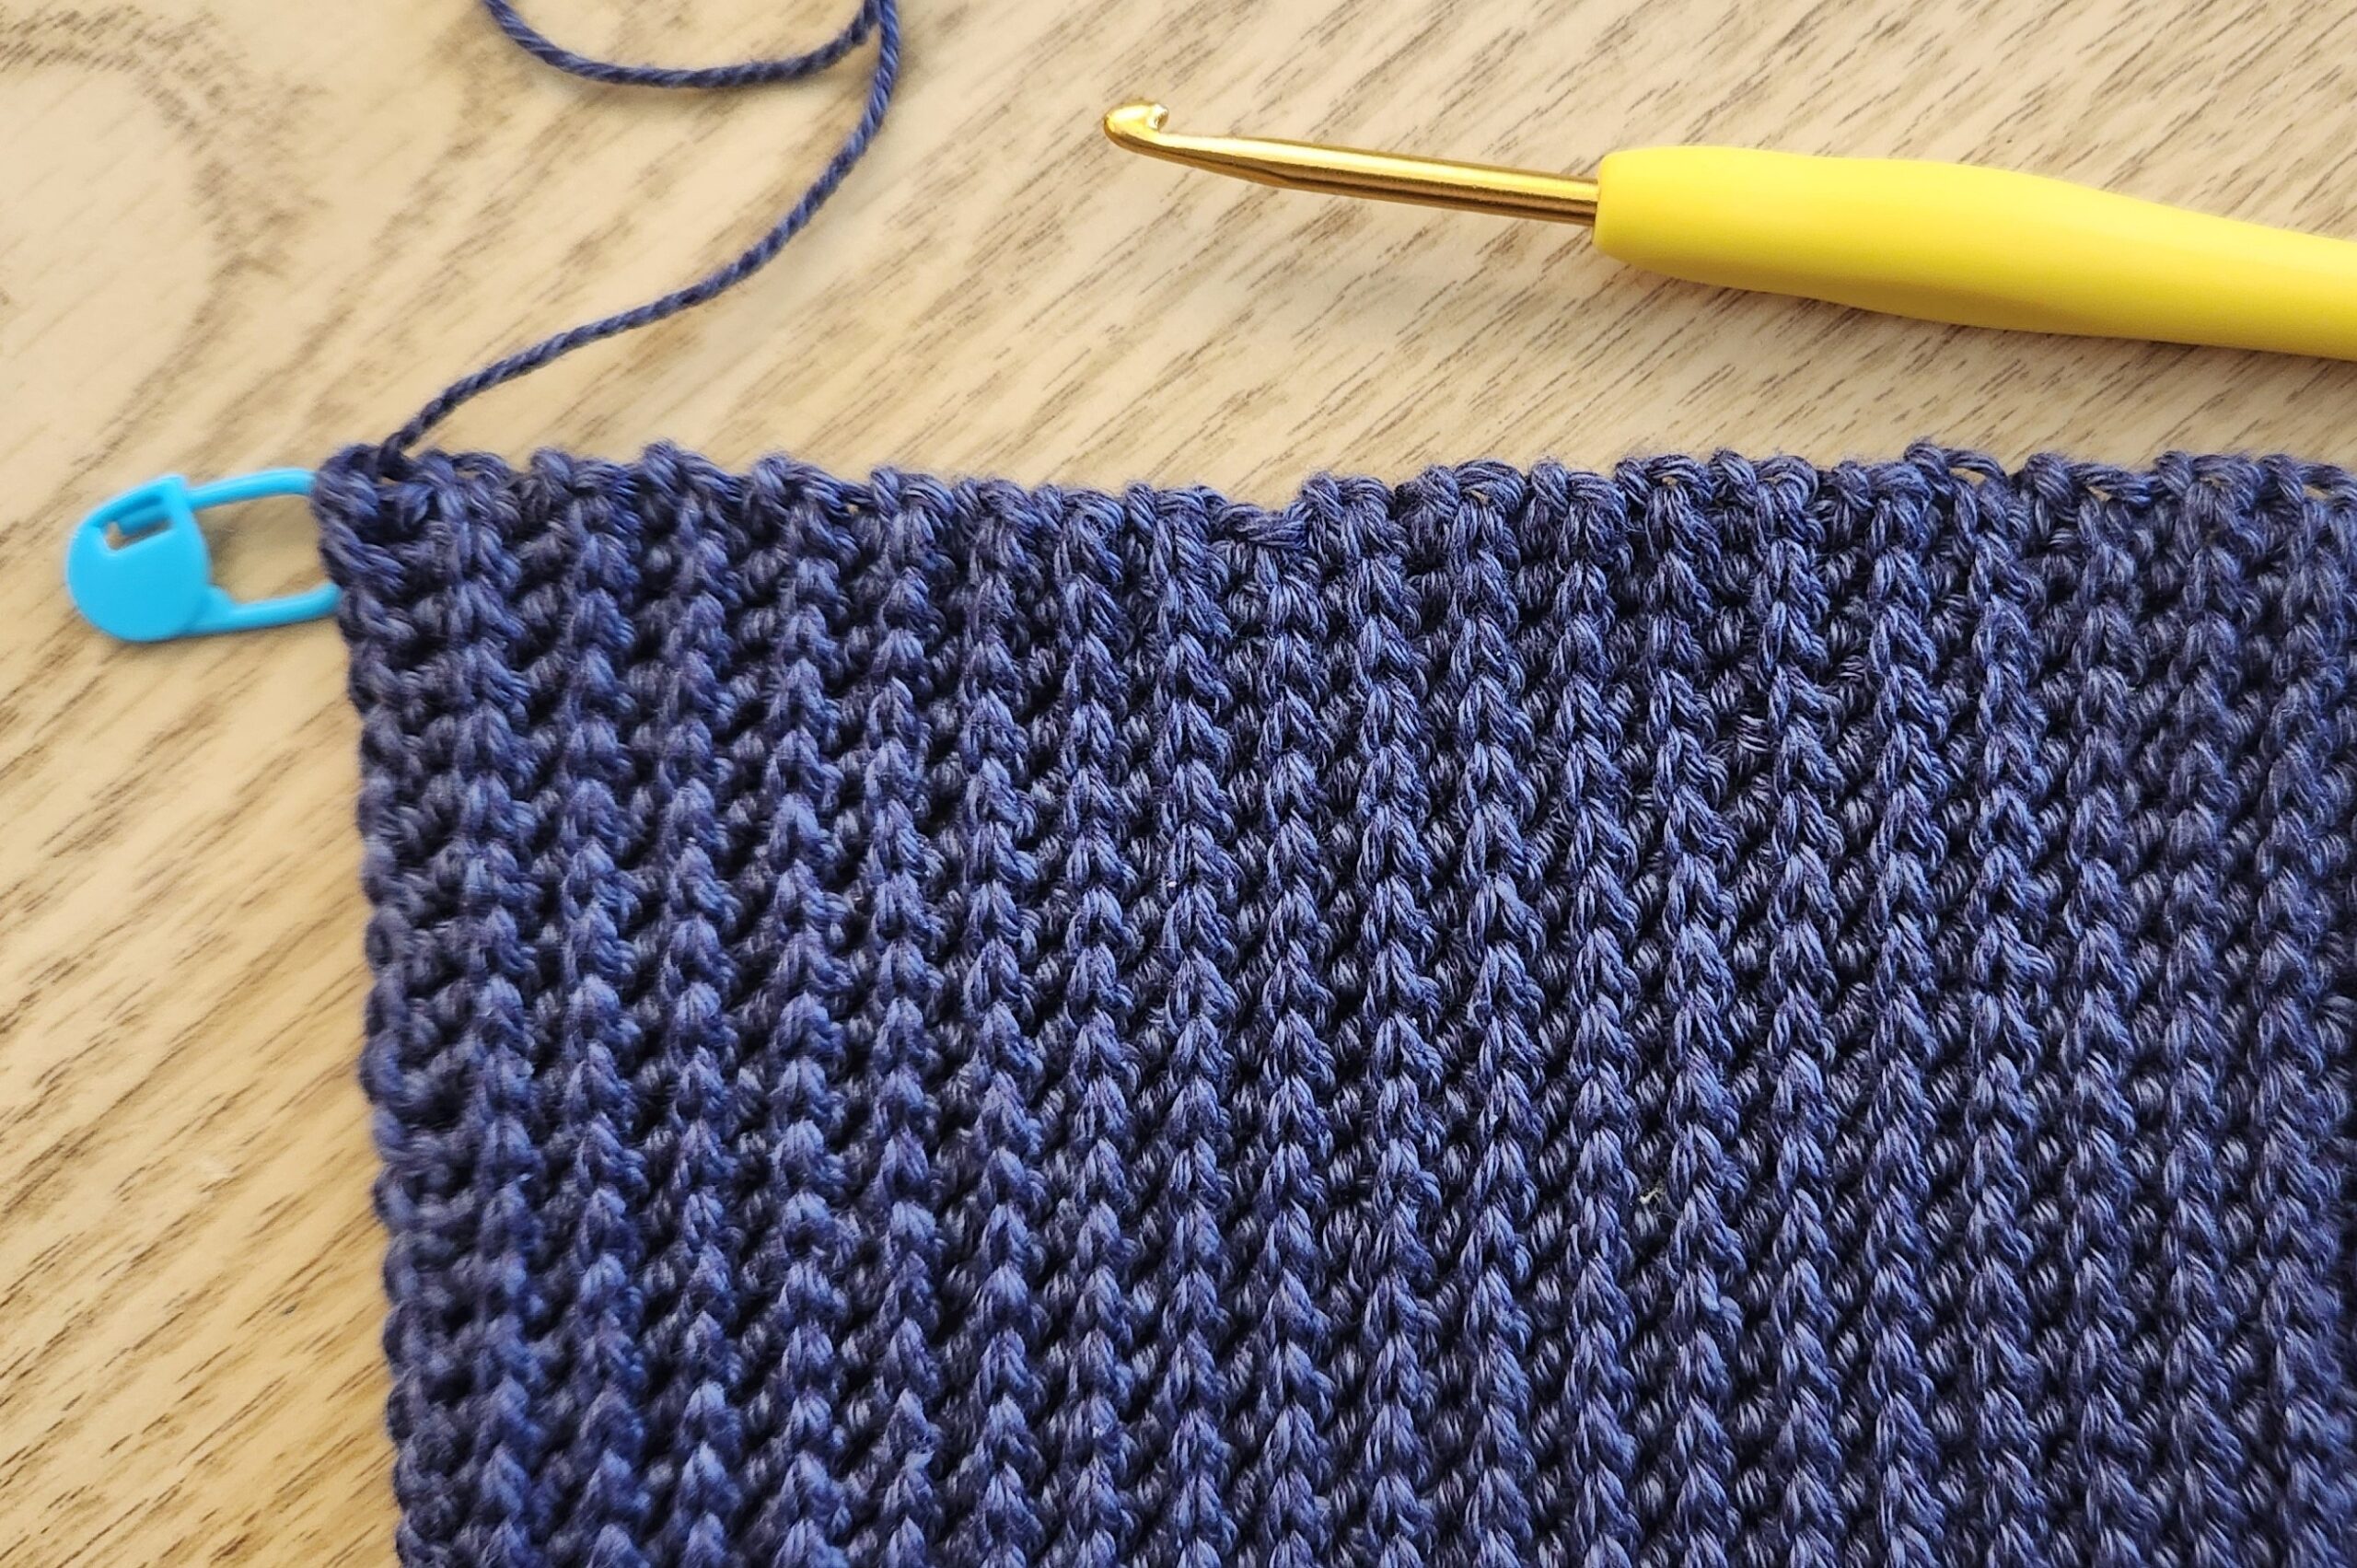
Yes! The smaller ribs are from a single slip stitch row, as pictured.
So, if you aren’t counting the foundation chain as your first row, these will be your odd-numbered rows.
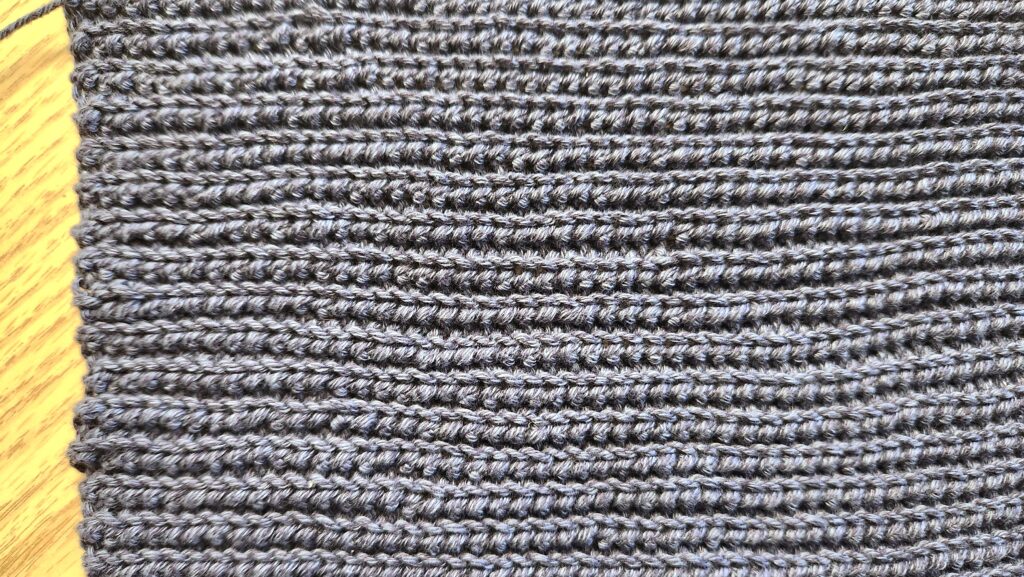
The chunkier ribs you’ll see on the flip side of your work are created by the double slip stitch, so these are even-numbered rows, if you don’t count the foundation chain.
Thanks for following along Crochet Cowgirl’s first tutorial!
What do you think you’ll use this stitch for? Let me know in the comments, I’d love to hear!
If you have questions, you can reach me through my About/Contact page or leave a comment as well!
Happy hooking!

Leave a Reply